

Interior Walls
Tools:

Purdy 3/8 inch nap 9 inch Roller Covers- for most walls and textures (a larger nap may be needed for overly textured walls)

Purdy Brushes- You will want a 2.5” angled brush, and a 1.5” angled brush for Latex paint (usually the ones with a green label on them). You Do Not want to buy cheap brushes! Besides a great paint color this will make or break how your paint job looks. These brushes are well worth the price tag. They range from $15.00 to $10.00 and will last way past one paint job if well taken care of.

Painters Drop Cloth- If you are only painting one room I would just buy a cheap plastic drop cloth, but if you are going to be painting multiple rooms you may want to invest in a cloth painters drop cloth.
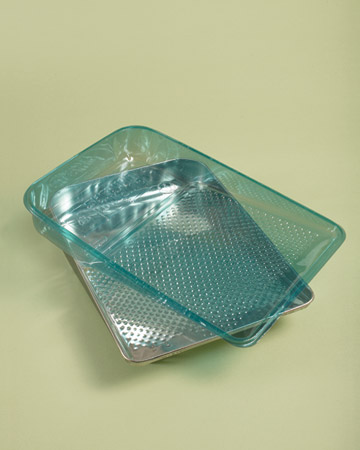
Paint Trays- Buy one or two metal paint trays (depending on how many people will be painting) along with plastic tray inserts. The inserts will keep your metal paint trays clean and make clean up easy.

Paint Roller- You will want to buy 9 inch rollers one for each person who will be painting.

Paint Extension Pole- Buy an extension pull that will reach the highest area you are wanting to painting.
Screw Driver- For removing light fixtures and switch and outlet plates.
Paint- I use Benjamin Moore colors and have them mixed in the Home Depot Behr Paint. They have most the color formulas in their system so for the most part you should just have to give them the color name or number. Worst case scenario take them a paint swatch of the color and they can match it for you.
Paint Finish Suggestions:
Flat Walls = Flat Enamel Paint
Trim = Glossy
Baths or Kitchens = Satin or Semi Gloss
Textured Walls = Eggshell or Satin
Tip: Gallon of paint = about 500 square feet
Room Prep: Before painting make sure that your walls are clean and ready for paint. Remove all switch plates, outlet plates, and lighting fixtures that are on walls that will be painted. If your room is currently furnished remove or cover as much furniture as possible to avoid paint damage to your furniture from accidents or paint splatter. Cover all flooring or at least the flooring in front of the wall you are currently painting. If your walls are not white and or have a strong or dark color currently on them priming is most likely necessary to assure that the new paint color you have selected will show up true to its color.
Priming: Depending on the color of wall you are priming you may need up to three coats of primer. You want the wall to mostly be white and the previous color to be masked. To make things go a little faster you can get your new selected paint color mixed into the primer that way when you go to use the actual paint you will need less coats.
Painting: Use your rollers to cover the majority of the wall surface making sure to avoid contact with trims and areas you do not want painted. Roll the paint on in a W motion making sure to get good coverage on your walls. Make sure you have plenty of paint on your roller, but not too much that you are getting drips or heavy splatter. Do Not over roll areas. This will result in removing paint and decreasing your paints coverage. Do one coat, let thoroughly dry, and repeat until satisfied with coverage.
Cutting: Cutting is the painting you will do around trim, doors, baseboards and windows with a brush. Use a steady hand and cut into the trim areas with your angled brush. Again make sure you have plenty of paint on your brush, but not too much that you can not control the paint. Paint should never have to go more than 2 inches up your brush. Do Not over brush. Do one coat, let thoroughly dry, and repeat until satisfied with coverage. This step takes practice and should improve as you go. Take your time because this step will me the difference between an amateur looking paint job and a professional looking paint job. Make those cuts as clean and as sharp as you can. Notice how I did not instruct you to tape off the room. If you can get this step down it will save you money and the pain of taping off everything. Which in my opinion does not give you the best look anyways.
Clean Up: Make sure to wash your brushes immediately after each use to insure the longevity of your brushes. Simply wash with warm water and dish soap until brush is cleaned of all paint. Roller covers can be thrown away and I would just use each roller cover for one application of paint. If you want to save a roller cover for a second coat that you will be doing the same day I would suggest wrapping your roller cover while still on the roller in a plastic grocery bag. Make sure the bag is wrapped tight and this should keep the paint on your roller moist so that you can use it again with out problem. Put on all your switch plates and outlet plates, put the furniture back and enjoy your new room.
Oops Tip: If you accidentally get paint on an area or piece of trim that you do not want painted on immediately wipe it off with a paper towel that has warm water on it. For more detailed accidents use a q-tip with warm water on it.


12.15.09+no+background.gif)


No comments:
Post a Comment