Showing posts with label housewife how to. Show all posts

Tuesday, April 6, 2010

Homemade Sugaring Wax - Wax On Wax Off

homemade sugaring waxThe other night, in-fact it was the same night we painted the laundry room, the husband brought up waxing. To spare the innocent I will leave out the details of the conversation, but it got me thinking about sugaring. I had had this done on my sensitive areas one time before, and it was sooooo much better than being waxed. I also just figured out that there is an esthetician at Blush salon studio and spa that I go to that does this sugaring method. Then I wondered if there was an easy way to make sugaring wax at home.

Fancy that there was!

After watching 5 million horrible you tube videos on how to make it I tried it out myself. It is not the easiest thing to make by a long shot. The ingredients are very simple and what most people already have in their kitchens, but it has to be cooked just right. Not too much and not to little, which can be tricky when that is only a minute or two difference. There are videos online that show people using the sugaring in an almost putty consistency, but I could not get mine to that state. I did have success with my second batch though and was able to use it like a hot wax, spreading it on and applying a strip of muslin fabric over it and then ripping it off the area. It worked great! I was really happy with it and was excited to have a cheap waxing option that I could do at home.

I only have my eye brows waxed about twice a year, and get the "every blue moon" bikini wax. This made me excited to wax more. Cost wise it has never been worth it for me to wax my legs, arms, or face. I would never think about trying grocery store waxes for the sole worry of bad reactions to cheap chemical mixes. This is all natural though, which means little to no chance of reaction. I remember when I got it done I had no irritation or break-out at all. Which I loved, I mean who wants to go exchange hair for a rash and pimples. No thanks!

homemade sugaring wax
So the recipe for sugaring wax is...

2 cups sugar (any sugar, I used white)
1/4 cup water
1/4 cup lemon juice (fresh squeezed or bottled)

Place and mix these ingredients in a sauce pan on the stove over a medium high temperature. The mixture will begin to bubble and boil a little (make sure not to over boil). After about 5 minutes the mixture will at some point begin to change color. When it looks a golden brown (almost like honey) you will want to remove from stove and pour into a clean container for storing (one that can be reheated). You can also get a spoon-full of the sugar water and run it under cold water to make sure it is sticky and will slightly ball up to see if it is done. Others said that a candy thermometer reading 260 will indicated a done sugaring wax (I did not have one). Let it cool for an hour or two. To heat it up just stick it in the microwave for about 30 seconds until it is a honey like consistency. Check how hot it is before applying to skin.

I loved the final working batch, but this can be frustrating to try and master. I think it is for-sure one of those things that you will love doing once you get it down though.

My poor husband and his brother had to be my ginny pigs for this wax in-between painting. It was a fun random night of crafts and projects though.

I will do a video on this as soon as I grow some leg hair out and get more sugar.
LOL!

Monday, April 5, 2010

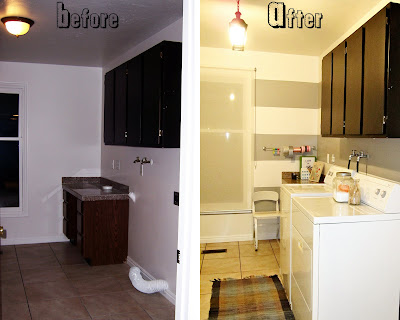
Laundry Room Makeover - How to Paint Stripes

laundry room makeover ideas
The weather here in Utah ruined my plans this last weekend for finishing my garden in the backyard, and getting family pictures taken. I was so disappointed, but was determined not to let the husbands three day Easter weekend go to waste. So I put him and his brother to work in the laundry room for a quick weekend room makeover.

frog tape review
I have been using frog tape lately for various projects of mine that have require me to use paint blocking tape. I have really liked it, and have thought it has lived up to it's claims. I was checking out their website the other week and found this great picture of a striped hallway on their homepage.

frog tape paint idea
I loved it! I have a favorite piece of fabric that is white and gray striped, and I am still waiting to find the perfect project to use it for. So I thought, what would be even better than my favorite fabric? Having a room in my house that makes me feel like I am living in my favorite fabric!

laundry room light idea
I had the husband replace the stock dome light with this black lantern style indoor/outdoor pendant light that I bought off of craigslist for $10.00. I have another one that I will put in the laundry room bathroom as-well. I wish they were a little bigger, but I think they look fun. I have to fix the paint on the ceiling though, because it looks like the previous owners (the bank) just painted around the dome light.

how to paint strips on wall
We then went to work marking off where our paint stripes would be. You want to first decide how big you want your stripes to be and then measure them out on the wall with a tape measure marking your stripes with a pencil mark on the wall about every foot or so. We wanted this project to be quick and easy, so we made sure that we would start and end with a white stripe so that we did not have to do as much cutting (painting against trim-work or ceiling with a brush).

how to tape paint strips on wall
After we were done marking everything we began to tape. When you tape the stripes off make sure you are placing the tape in the correct spot. Depending on what stripe you are painting your tape will either go above or below your marks. Check your tape once placed on the wall to make sure your tape is level. Not all walls are level and that could effect your marks and taping, so make sure to double check everything before painting. After we finished taping we ran the edge of a credit card over all the tape to make sure it was adhered well to the wall, and that there were no bubbles.

how to paint strips on a wall
*opposite of what this picture is showing I would recommend to paint horizontally with the tape to assure you do not pull the tape up while painting*

Next step paint! I used the same color gray that I used on my kitchen table which was San Antonio Gray by Benjamin Moore (mixed in Behr paint from the Home Depot). We used rollers to paint the majority of the taped off sections. Make sure you paint the right section! I was really paranoid about this because I do not have the white paint for this room. So touching up and fixing mistakes was out of the question. Then we used our Purdy brushes to do the cutting in the corners and edges. Purdy brushes are a must for any good paint job, don't waste your money buying cheap brushes. The tricky part here is that you do not want the paint to dry too much because it could affect the tape and the sharpness of your line, but you still will probably need to do two coats of paint. We waited about 10 minutes or so before doing the second coat of paint, and cutting. So if you are doing a big area it would probably be best to work in little sections rather than rolling a first coat on the whole room. It will just leave you scrambling to get all the cutting done in-time for a second coat.

painting strips san antonio gray
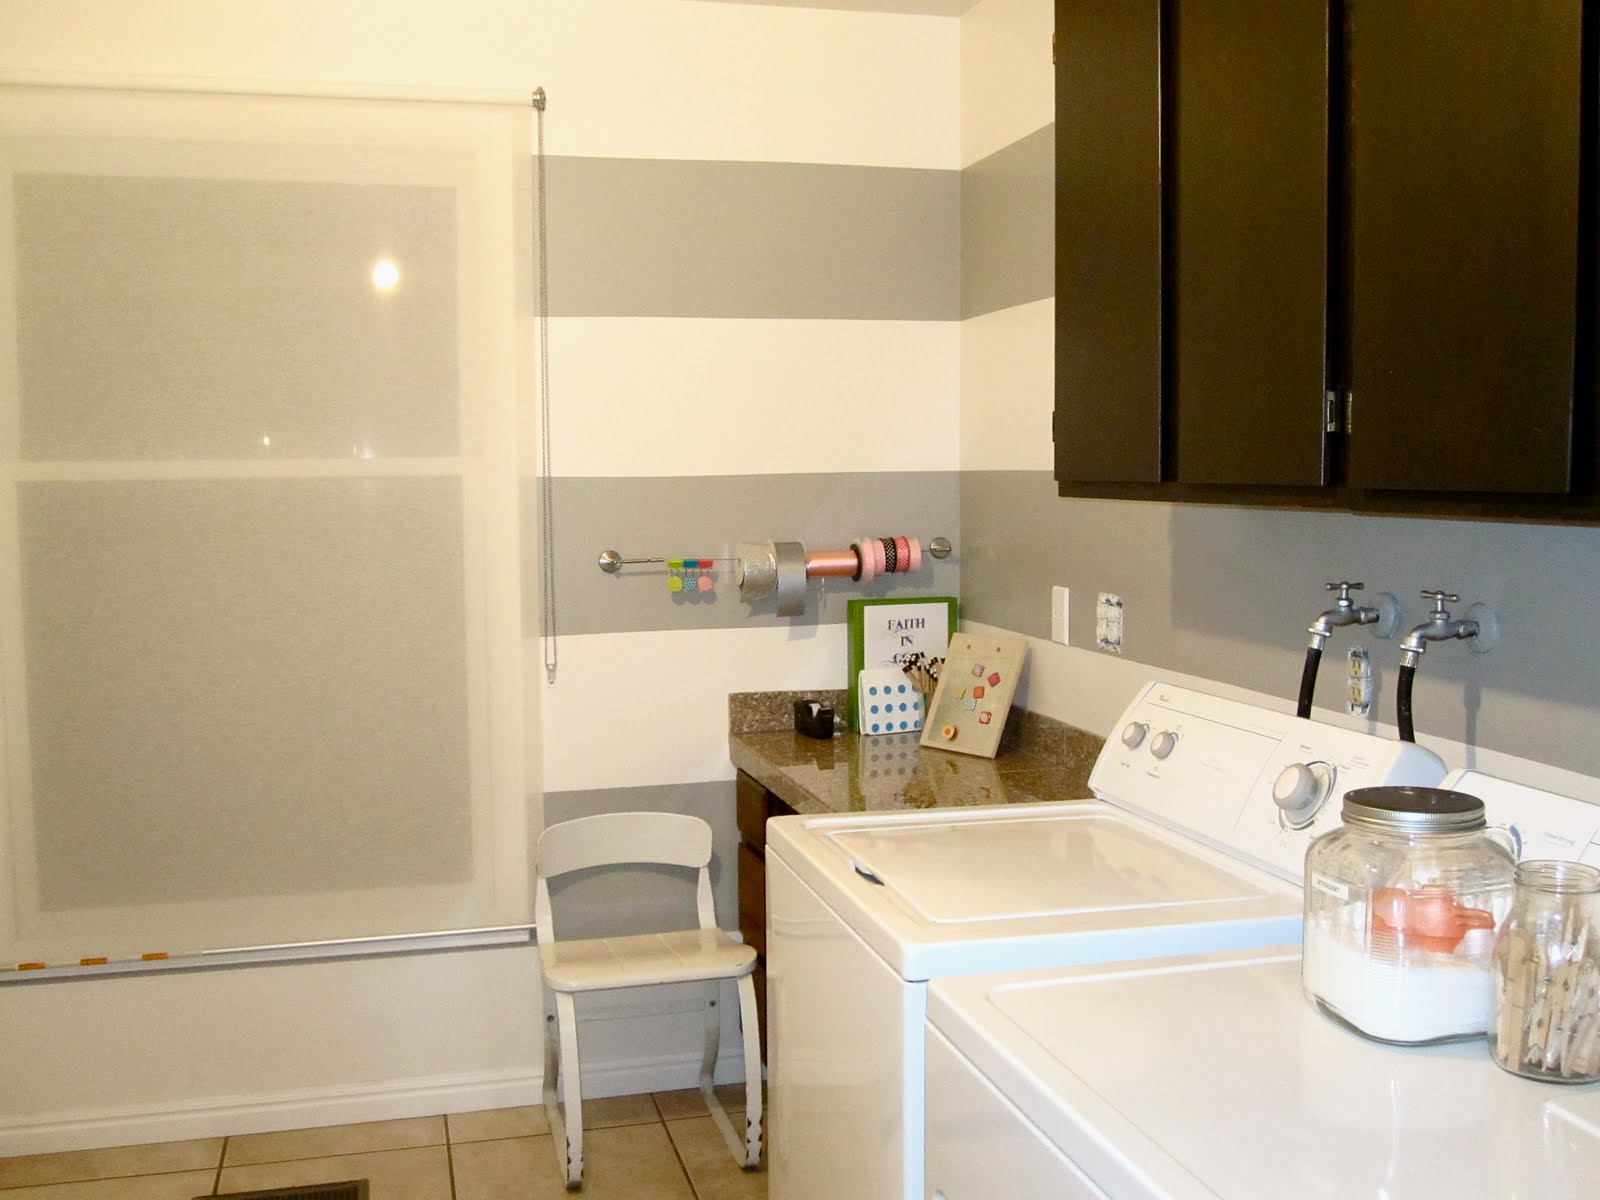
Then comes the fun part! peeling off the tape to reveal your freshly painted crisp stripes.

white and gray stripped walls
We removed the tape immediately after painting the second coat. You want to double check that all your tape edges are well painted. Remember you can always touch up the center of the stripes, but the edges where the tape is will be almost impossible to touch up afterwards. This was the biggest project I have used frog tape on and it really pulled through for me. I had almost no touch ups or bleeding to deal with. The little that I did have was quickly removed or fixed with a wet Q-tip since the paint was still fairly wet after removing the tape. It was critical to me that my tape work well, since like I stated before I did not have the white paint used in this room.

laundry room before and after stripped wall ideas
I love my "new" laundry room. It makes me so happy to go in there that I may actually do laundry. I am still trying to decide what color to paint the cabinets in there. White, gray, or blue are the choices. Let me know what you think I should paint them. Now all I have to do is a little accessorizing and I think I will have a pretty spiffy laundry room.

laundry room paint ideas laundry room makeover ideas san antonio gray wall stripes

DIY Day @ ASPTL

Friday, March 26, 2010

Knock Off Wood


If you have not heard of the Blog
Knock Off Wood you need to get with it. In my opinion it is the biggest thing to hit the DIY Blogging world in a long time.

Ana of Knock Off Wood an Alaskan mommy and wife to a carpenter handy-man took things into her own hands one day when her husband wasn't getting around to fixing some porch steps, and just fixed them herself. Ana has been doing woodworking ever since and now her passion for knocking off high end furniture lines (hmm hmm Pottery Barn hmm hmm) has spilled over into the blog world and is inspiring everyone. Ana has full how to plans for beds, dressers, dining-room tables, office systems and more available on her
blog, for get this... FREE!

My list of things to build off her site is a mile long. Starting with all the furniture for my soon to be
craft-room of my dreams. However I did see this cute little kids picnic bench on her site and had to build it for Jayna.

plans for kids picnic bench
It was a great starter project to get my feet wet, and went fairly well. I only needed the Husbands help to cute four pieces, and am sure that what I learned while doing this project will just make me better on the next. It is all about not underestimating yourself or your abilities, and that could be the single reason why Ana's blog is so popular.

I have already ordered my
Milk Paint and Exterior Top-Coat in Buttermilk Yellow for the picnic bench, and with the help of Jayna have already distressed it a little. I didn't know a two year old could do such damage banging an old hinge on wood. Oh-well.

I encourage you to check out her blog, but only if you are ready to triple your to do list.

Tuesday, March 16, 2010

How To Clean Out Your Dryer

The clothes in my dryer have not been drying like they used to. I have been finding that it is taking me more than one cycle to get things dry even with the lint trap all cleaned out. Today when I started her up it just didn't sound look or smell right and I got worried. I called the husband and work to inform him of the pending housewife dilemma and he said he would work on it when he got home. I know his night is going to be busy though, because he will be attending to his youth church calling like the good man he is. So I jumped online found out what to do and went to work. I documented it on video for everyone so that you can see that it is possible to do on your own with a two year old wondering around. You just might have to hold the tools with an Elmo puppet on your hand that's all.

Thursday, October 1, 2009


Interior Walls

Tools:

Purdy 3/8 inch nap 9 inch Roller Covers- for most walls and textures (a larger nap may be needed for overly textured walls)

Purdy Brushes- You will want a 2.5” angled brush, and a 1.5” angled brush for Latex paint (usually the ones with a green label on them). You Do Not want to buy cheap brushes! Besides a great paint color this will make or break how your paint job looks. These brushes are well worth the price tag. They range from $15.00 to $10.00 and will last way past one paint job if well taken care of.

Painters Drop Cloth- If you are only painting one room I would just buy a cheap plastic drop cloth, but if you are going to be painting multiple rooms you may want to invest in a cloth painters drop cloth.

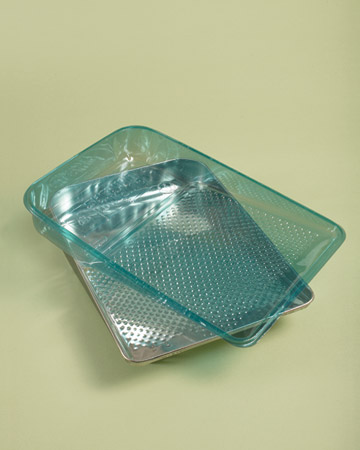
Paint Trays- Buy one or two metal paint trays (depending on how many people will be painting) along with plastic tray inserts. The inserts will keep your metal paint trays clean and make clean up easy.

Paint Roller- You will want to buy 9 inch rollers one for each person who will be painting.

Paint Extension Pole- Buy an extension pull that will reach the highest area you are wanting to painting.
Screw Driver- For removing light fixtures and switch and outlet plates.
Paint- I use Benjamin Moore colors and have them mixed in the Home Depot Behr Paint. They have most the color formulas in their system so for the most part you should just have to give them the color name or number. Worst case scenario take them a paint swatch of the color and they can match it for you. 
Paint Finish Suggestions: 
Flat Walls = Flat Enamel Paint
Trim = Glossy
Baths or Kitchens = Satin or Semi Gloss
Textured Walls = Eggshell or Satin
Tip: Gallon of paint = about 500 square feet
Room Prep: Before painting make sure that your walls are clean and ready for paint. Remove all switch plates, outlet plates, and lighting fixtures that are on walls that will be painted. If your room is currently furnished remove or cover as much furniture as possible to avoid paint damage to your furniture from accidents or paint splatter. Cover all flooring or at least the flooring in front of the wall you are currently painting. If your walls are not white and or have a strong or dark color currently on them priming is most likely necessary to assure that the new paint color you have selected will show up true to its color.

Priming: Depending on the color of wall you are priming you may need up to three coats of primer. You want the wall to mostly be white and the previous color to be masked. To make things go a little faster you can get your new selected paint color mixed into the primer that way when you go to use the actual paint you will need less coats.
Painting: Use your rollers to cover the majority of the wall surface making sure to avoid contact with trims and areas you do not want painted. Roll the paint on in a W motion making sure to get good coverage on your walls. Make sure you have plenty of paint on your roller, but not too much that you are getting drips or heavy splatter. Do Not over roll areas. This will result in removing paint and decreasing your paints coverage. Do one coat, let thoroughly dry, and repeat until satisfied with coverage.
Cutting: Cutting is the painting you will do around trim, doors, baseboards and windows with a brush.  Use a steady hand and cut into the trim areas with your angled brush. Again make sure you have plenty of paint on your brush, but not too much that you can not control the paint. Paint should never have to go more than 2 inches up your brush. Do Not over brush. Do one coat, let thoroughly dry, and repeat until satisfied with coverage. This step takes practice and should improve as you go. Take your time because this step will me the difference between an amateur looking paint job and a professional looking paint job. Make those cuts as clean and as sharp as you can. Notice how I did not instruct you to tape off the room. If you can get this step down it will save you money and the pain of taping off everything. Which in my opinion does not give you the best look anyways.
Clean Up: Make sure to wash your brushes immediately after each use to insure the longevity of your brushes. Simply wash with warm water and dish soap until brush is cleaned of all paint. Roller covers can be thrown away and I would just use each roller cover for one application of paint. If you want to save a roller cover for a second coat that you will be doing the same day I would suggest wrapping your roller cover while still on the roller in a plastic grocery bag. Make sure the bag is wrapped tight and this should keep the paint on your roller moist so that you can use it again with out problem. Put on all your switch plates and outlet plates, put the furniture back and enjoy your new room.
Oops Tip: If you accidentally get paint on an area or piece of trim that you do not want painted on  immediately wipe it off with a paper towel that has warm water on it. For more detailed accidents use a q-tip with warm water on it.


Painting Cabinets (coming soon)