

Showing posts with label paint colors. Show all posts
Showing posts with label paint colors. Show all posts
Monday, February 7, 2011
TV Frame: Part 2


Wednesday, November 10, 2010
Straight From the Factory


NOT!!!
That is just a $10 yard sale find that I painted.
This post is going to rock your painting world...
Sunday, May 23, 2010
Annie Get Your Gun!: Gun Cabinet Makeover

Tuesday, April 27, 2010
Playing With Color

Wednesday, April 14, 2010
Kids Picnic Bench: Finished and Painted

I finally finished painting Jaynas picnic bench. My husband thought I was crazy to do two coats of paint, antiquing, glazing, staining, and two coats of top coat on an outdoor kids picnic bench, but I love how it turned out.

I am hoping this will be one of those items that Jayna will want to pass down to her kids someday. I built it well enough and treated it well enough that it could be. That is if I can part with it and the memories it will hold by then of her being a little girl playing in my backyard.
For Painting Technique How To Click the Read More Button Below...
Monday, April 5, 2010
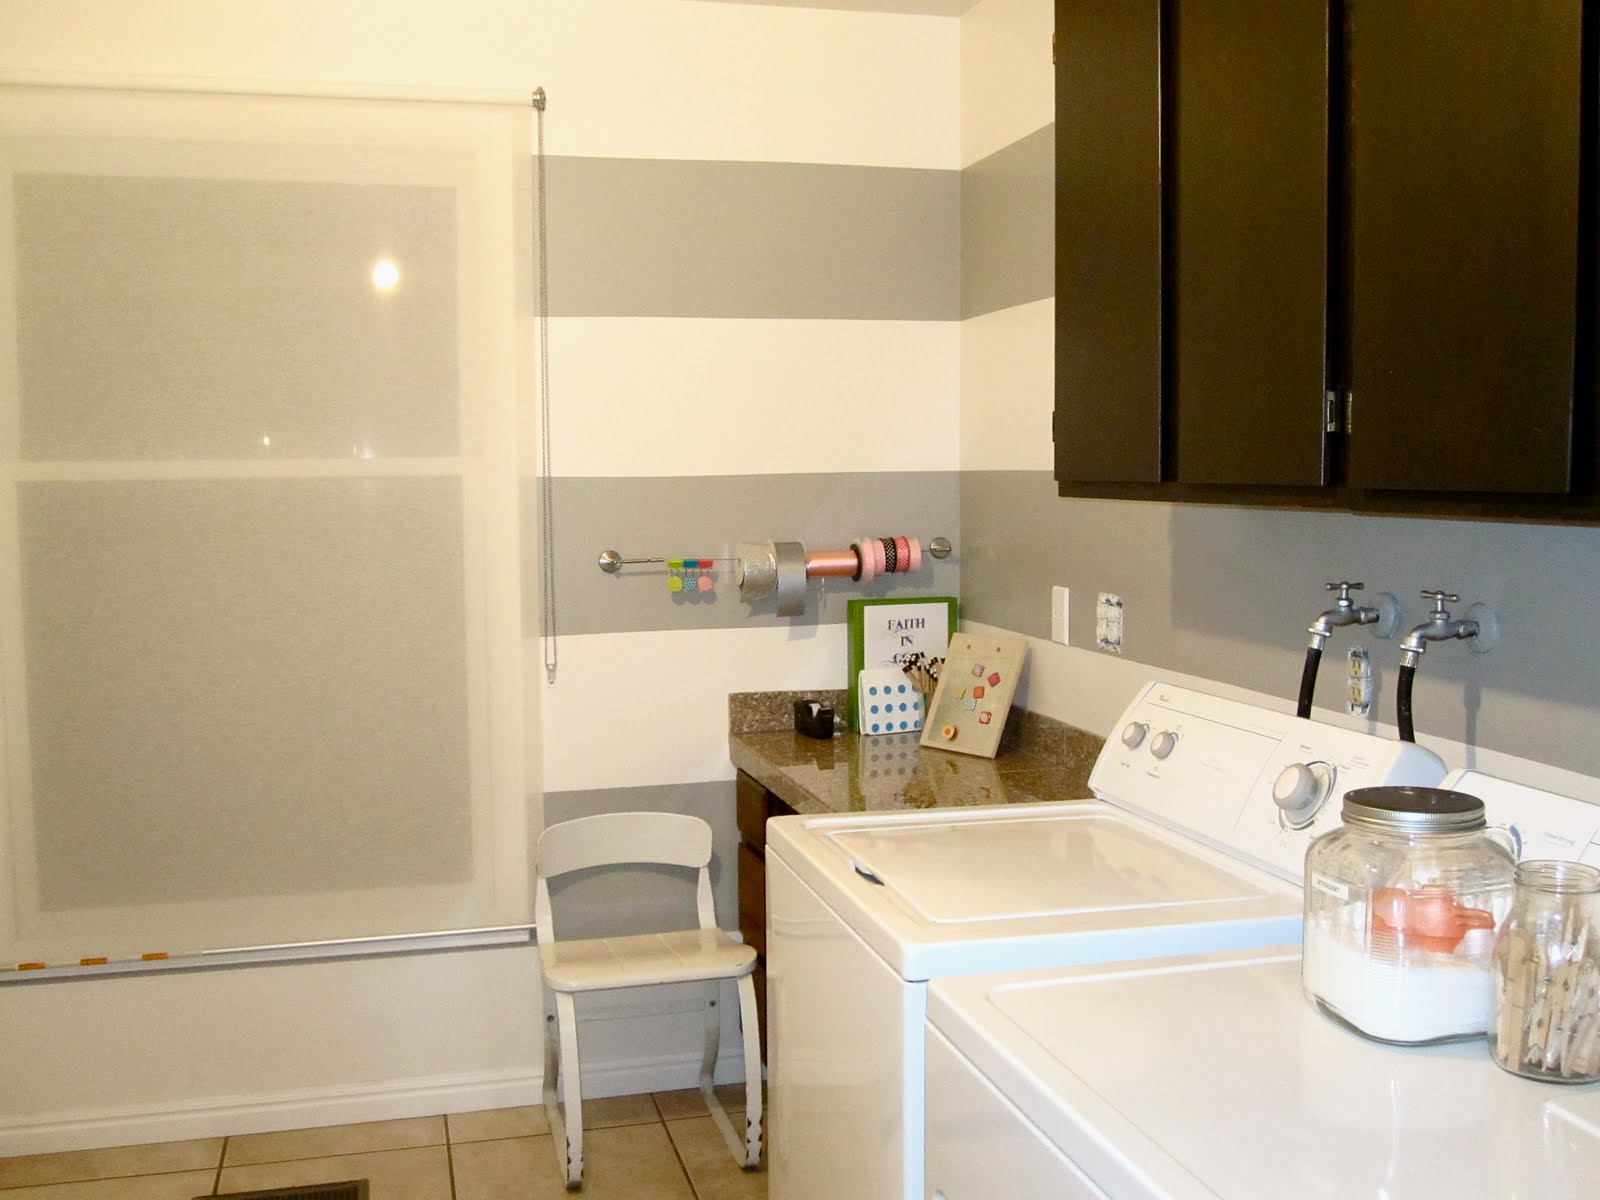
Laundry Room Makeover - How to Paint Stripes

The weather here in Utah ruined my plans this last weekend for finishing my garden in the backyard, and getting family pictures taken. I was so disappointed, but was determined not to let the husbands three day Easter weekend go to waste. So I put him and his brother to work in the laundry room for a quick weekend room makeover.




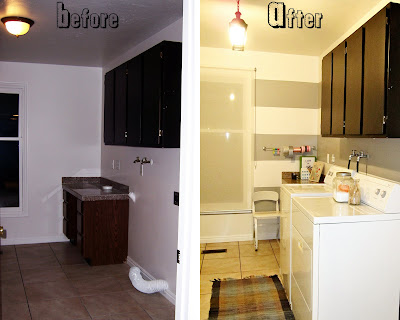


I have been using frog tape lately for various projects of mine that have require me to use paint blocking tape. I have really liked it, and have thought it has lived up to it's claims. I was checking out their website the other week and found this great picture of a striped hallway on their homepage.

I loved it! I have a favorite piece of fabric that is white and gray striped, and I am still waiting to find the perfect project to use it for. So I thought, what would be even better than my favorite fabric? Having a room in my house that makes me feel like I am living in my favorite fabric!

I had the husband replace the stock dome light with this black lantern style indoor/outdoor pendant light that I bought off of craigslist for $10.00. I have another one that I will put in the laundry room bathroom as-well. I wish they were a little bigger, but I think they look fun. I have to fix the paint on the ceiling though, because it looks like the previous owners (the bank) just painted around the dome light.

We then went to work marking off where our paint stripes would be. You want to first decide how big you want your stripes to be and then measure them out on the wall with a tape measure marking your stripes with a pencil mark on the wall about every foot or so. We wanted this project to be quick and easy, so we made sure that we would start and end with a white stripe so that we did not have to do as much cutting (painting against trim-work or ceiling with a brush).

After we were done marking everything we began to tape. When you tape the stripes off make sure you are placing the tape in the correct spot. Depending on what stripe you are painting your tape will either go above or below your marks. Check your tape once placed on the wall to make sure your tape is level. Not all walls are level and that could effect your marks and taping, so make sure to double check everything before painting. After we finished taping we ran the edge of a credit card over all the tape to make sure it was adhered well to the wall, and that there were no bubbles.

*opposite of what this picture is showing I would recommend to paint horizontally with the tape to assure you do not pull the tape up while painting*
Next step paint! I used the same color gray that I used on my kitchen table which was San Antonio Gray by Benjamin Moore (mixed in Behr paint from the Home Depot). We used rollers to paint the majority of the taped off sections. Make sure you paint the right section! I was really paranoid about this because I do not have the white paint for this room. So touching up and fixing mistakes was out of the question. Then we used our Purdy brushes to do the cutting in the corners and edges. Purdy brushes are a must for any good paint job, don't waste your money buying cheap brushes. The tricky part here is that you do not want the paint to dry too much because it could affect the tape and the sharpness of your line, but you still will probably need to do two coats of paint. We waited about 10 minutes or so before doing the second coat of paint, and cutting. So if you are doing a big area it would probably be best to work in little sections rather than rolling a first coat on the whole room. It will just leave you scrambling to get all the cutting done in-time for a second coat.

Then comes the fun part! peeling off the tape to reveal your freshly painted crisp stripes.

We removed the tape immediately after painting the second coat. You want to double check that all your tape edges are well painted. Remember you can always touch up the center of the stripes, but the edges where the tape is will be almost impossible to touch up afterwards. This was the biggest project I have used frog tape on and it really pulled through for me. I had almost no touch ups or bleeding to deal with. The little that I did have was quickly removed or fixed with a wet Q-tip since the paint was still fairly wet after removing the tape. It was critical to me that my tape work well, since like I stated before I did not have the white paint used in this room.
I love my "new" laundry room. It makes me so happy to go in there that I may actually do laundry. I am still trying to decide what color to paint the cabinets in there. White, gray, or blue are the choices. Let me know what you think I should paint them. Now all I have to do is a little accessorizing and I think I will have a pretty spiffy laundry room.


Friday, March 26, 2010
Knock Off Wood

If you have not heard of the Blog Knock Off Wood you need to get with it. In my opinion it is the biggest thing to hit the DIY Blogging world in a long time.
Ana of Knock Off Wood an Alaskan mommy and wife to a carpenter handy-man took things into her own hands one day when her husband wasn't getting around to fixing some porch steps, and just fixed them herself. Ana has been doing woodworking ever since and now her passion for knocking off high end furniture lines (hmm hmm Pottery Barn hmm hmm) has spilled over into the blog world and is inspiring everyone. Ana has full how to plans for beds, dressers, dining-room tables, office systems and more available on her blog, for get this... FREE!
My list of things to build off her site is a mile long. Starting with all the furniture for my soon to be craft-room of my dreams. However I did see this cute little kids picnic bench on her site and had to build it for Jayna.

It was a great starter project to get my feet wet, and went fairly well. I only needed the Husbands help to cute four pieces, and am sure that what I learned while doing this project will just make me better on the next. It is all about not underestimating yourself or your abilities, and that could be the single reason why Ana's blog is so popular.
I have already ordered my Milk Paint and Exterior Top-Coat in Buttermilk Yellow for the picnic bench, and with the help of Jayna have already distressed it a little. I didn't know a two year old could do such damage banging an old hinge on wood. Oh-well.
I have already ordered my Milk Paint and Exterior Top-Coat in Buttermilk Yellow for the picnic bench, and with the help of Jayna have already distressed it a little. I didn't know a two year old could do such damage banging an old hinge on wood. Oh-well.
Thursday, March 18, 2010
Check Out My Sponsors!
I am so excited to have two great sponsors for my blog!

I have been talking and talking about General Finishes and am now so excited to be-able to feature more of their products on my blog in the future. I have heard and seen so much about their milk paints and can not wait to get my hands on some, and see how great it is first hand.
 Park City Reservations is a wonderful vacation home rental site that you just have to use if you are coming my way. They have wonderful reservationists that can take care of all your vacationing needs here in Utah, or you can take care of everything yourself on-line.
Does it strike anyone else as funny that both of my sponsors have birds in their logos? I didn't plan it that way, but I do have to say that I love it.
A big THANK YOU to my sponsors. I look forward to our ongoing partnership.
Wednesday, March 17, 2010
The Craft Room of My Dreams

condo craft room
When we were looking for a new home after selling the condo it was hard to find a house with everything we wanted, but that is always the struggle when looking for a home. Then we found the house we are currently in. It had everything we wanted and much much more than we ever thought we would get out of a home. It was a home I had found online, and I remember walking into it for the first time. It seemed to good to be true, the first floor was so open and it was fresh looking. I walked past the living room and dining room, and then I turned the corner from the family room to see this space off the kitchen dining area.

"Ahhhhhhhh"(in angelic heavenly voices) is what I must have heard. It was the holy grail of craft room spaces right down to the french doors that adorned its entrance. (ignore the mess in there) I wish I could share it with every crafty women who does not have enough space at home, who is crafting at the kitchen table, or working out of a makeshift closet.

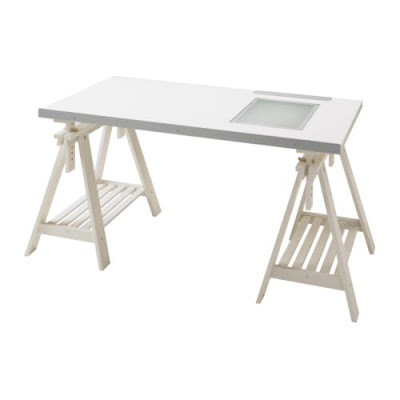 I got one of my craft tables for my birthday and will save up my pennies for the other one.
 We are going to be building desks that I will paint black to go around the room similar to these Pottery Barn ones, and we will also have some storage bookcases on one of the walls as-well. I am hoping to also put shelving in white around the top of the room like the picture above.
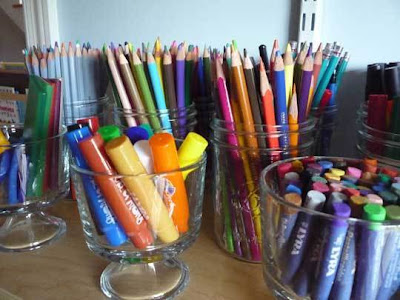


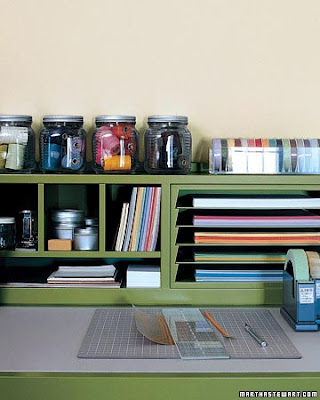


We are going to start slowly working on this room, and this is my inspiration. I have already bought the paint. It is going to be the same color blue as the playroom upstairs that we did for Jayna.
 I got one of my craft tables for my birthday and will save up my pennies for the other one.
 We are going to be building desks that I will paint black to go around the room similar to these Pottery Barn ones, and we will also have some storage bookcases on one of the walls as-well. I am hoping to also put shelving in white around the top of the room like the picture above.
I have big visions for this room and love that it also has a little door to the backyard off of it. I picture kids doing homework, me sewing drapes, and the husband working on the computer at a corner desk. Here are some other craft room inspirations that I love. I will keep you updated on this room as we go. For now we will all dream together.


Sunday, February 7, 2010
The Perfect Blue

Awhile back I helped a friend who moved to Virginia pick out colors for her new home. The blue we picked for her living-room and kitchen area was the blue dreams are made of. It is a Benjamin Moore color of course and the name of it is yarmouth blue HC-150.

The color in her kitchen area before was a green which made the honey colored cabinets and floor look golden and stark. Living back east for the first time she also wanted something more historical in color to embrace all the history she saw around her. When she sent me the after pictures I was in love. The color looked so amazing photographed that I could have cared less how it looked in person. I would paint a room in this color just to see it in a picture.
Since this client I have also helped a Sister-in-law paint a guest bedroom in this color and it is still as amazing as the first time I used it.
Both times this color was mixed at Home Depot in Behr Paint.
Thursday, October 1, 2009

Interior Walls
Tools:

Purdy 3/8 inch nap 9 inch Roller Covers- for most walls and textures (a larger nap may be needed for overly textured walls)

Purdy Brushes- You will want a 2.5” angled brush, and a 1.5” angled brush for Latex paint (usually the ones with a green label on them). You Do Not want to buy cheap brushes! Besides a great paint color this will make or break how your paint job looks. These brushes are well worth the price tag. They range from $15.00 to $10.00 and will last way past one paint job if well taken care of.

Painters Drop Cloth- If you are only painting one room I would just buy a cheap plastic drop cloth, but if you are going to be painting multiple rooms you may want to invest in a cloth painters drop cloth.
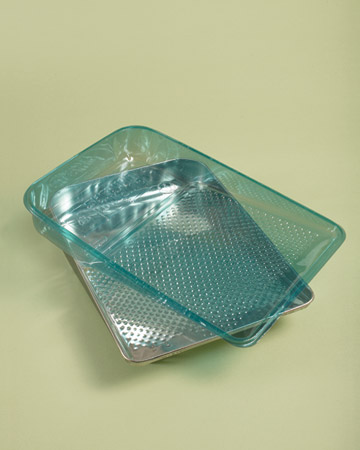
Paint Trays- Buy one or two metal paint trays (depending on how many people will be painting) along with plastic tray inserts. The inserts will keep your metal paint trays clean and make clean up easy.

Paint Roller- You will want to buy 9 inch rollers one for each person who will be painting.

Paint Extension Pole- Buy an extension pull that will reach the highest area you are wanting to painting.
Screw Driver- For removing light fixtures and switch and outlet plates.
Paint- I use Benjamin Moore colors and have them mixed in the Home Depot Behr Paint. They have most the color formulas in their system so for the most part you should just have to give them the color name or number. Worst case scenario take them a paint swatch of the color and they can match it for you.
Paint Finish Suggestions:
Flat Walls = Flat Enamel Paint
Trim = Glossy
Baths or Kitchens = Satin or Semi Gloss
Textured Walls = Eggshell or Satin
Tip: Gallon of paint = about 500 square feet
Room Prep: Before painting make sure that your walls are clean and ready for paint. Remove all switch plates, outlet plates, and lighting fixtures that are on walls that will be painted. If your room is currently furnished remove or cover as much furniture as possible to avoid paint damage to your furniture from accidents or paint splatter. Cover all flooring or at least the flooring in front of the wall you are currently painting. If your walls are not white and or have a strong or dark color currently on them priming is most likely necessary to assure that the new paint color you have selected will show up true to its color.
Priming: Depending on the color of wall you are priming you may need up to three coats of primer. You want the wall to mostly be white and the previous color to be masked. To make things go a little faster you can get your new selected paint color mixed into the primer that way when you go to use the actual paint you will need less coats.
Painting: Use your rollers to cover the majority of the wall surface making sure to avoid contact with trims and areas you do not want painted. Roll the paint on in a W motion making sure to get good coverage on your walls. Make sure you have plenty of paint on your roller, but not too much that you are getting drips or heavy splatter. Do Not over roll areas. This will result in removing paint and decreasing your paints coverage. Do one coat, let thoroughly dry, and repeat until satisfied with coverage.
Cutting: Cutting is the painting you will do around trim, doors, baseboards and windows with a brush. Use a steady hand and cut into the trim areas with your angled brush. Again make sure you have plenty of paint on your brush, but not too much that you can not control the paint. Paint should never have to go more than 2 inches up your brush. Do Not over brush. Do one coat, let thoroughly dry, and repeat until satisfied with coverage. This step takes practice and should improve as you go. Take your time because this step will me the difference between an amateur looking paint job and a professional looking paint job. Make those cuts as clean and as sharp as you can. Notice how I did not instruct you to tape off the room. If you can get this step down it will save you money and the pain of taping off everything. Which in my opinion does not give you the best look anyways.
Clean Up: Make sure to wash your brushes immediately after each use to insure the longevity of your brushes. Simply wash with warm water and dish soap until brush is cleaned of all paint. Roller covers can be thrown away and I would just use each roller cover for one application of paint. If you want to save a roller cover for a second coat that you will be doing the same day I would suggest wrapping your roller cover while still on the roller in a plastic grocery bag. Make sure the bag is wrapped tight and this should keep the paint on your roller moist so that you can use it again with out problem. Put on all your switch plates and outlet plates, put the furniture back and enjoy your new room.
Oops Tip: If you accidentally get paint on an area or piece of trim that you do not want painted on immediately wipe it off with a paper towel that has warm water on it. For more detailed accidents use a q-tip with warm water on it.


Subscribe to:
Posts (Atom)


12.15.09+no+background.gif)


